


SGAFT: Sidewall winterization for small greenhouses
The previous article in this series concluded that sidewall management in a small greenhouse is not a passive task once the greenhouse is operational. This article describes how a naturally ventilated greenhouse with roll up sidewalls was winterized to improve heat retention and maximize energy conservation through the heating season.
My 24-by-40 research greenhouse is equipped with roll up sidewalls and ridge vent, providing year-round natural ventilation. The roll up version of a side vent was chosen over a traditional, rigid, rack and pinion design due to construction budget restrictions. By providing budget relief, the roll up version was one piece of a customized package of design features my Prospiant representative helped me create to fit my needs.
Hand-cranking side vents over many years on my commercial range required up and down adjustment during the day to respond to temperature fluctuation. This time around the side vents are automated, which is particularly appreciated given the memory of manual operation. Now, side vent operation is dynamically controlled by a Bartlett Instrument Co. ClimateBoss environment control system. One side vent is shown partially open in Figure 1.
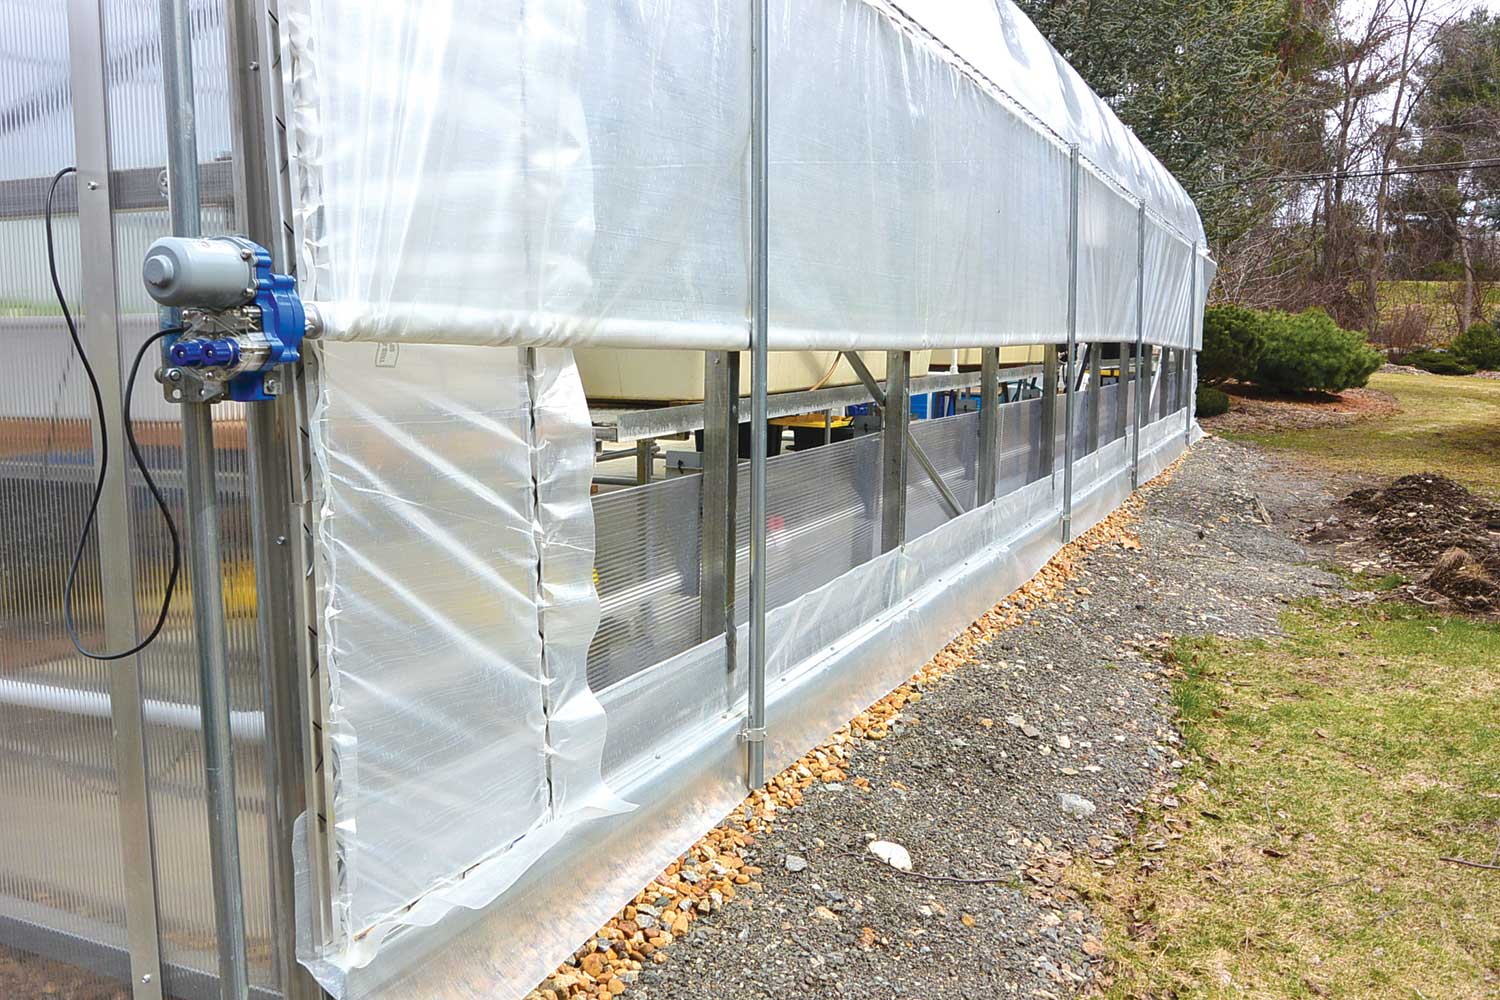
Figure 1. Photos courtesy of Peter Konjoian.
THE SNOW’S RIGHT THERE
The first heating season in this new greenhouse triggered a concern regarding heat retention of the single-layer sidewall fabric. A significant winter storm’s snow load slid off the roof and accumulated on the ground, pressing against the flexible fabric and reaching halfway up the sidewall. One can self twist into a pretzel rationalizing that snow piled that high offers insulative value against cold outside temperatures. Still, placing my hand within an inch of the inside of the fabric and feeling cold was concerning. Let’s just say it was going to cause a sleep deficit.
Compared to the double poly-covered roof and twin wall polycarbonate on the end walls, my conclusion was that the sidewalls were a weak link regarding the structure’s heat retention and energy use efficiency. To be clear, and as stated in previous articles, this is not a complaint. I couldn’t afford a higher efficiency sidewall vent and am grateful a more economical version was available. I also knew the performance of the walls needed to be improved before the second heating season.
POLY’S ALWAYS HANDY
Most of my commercial greenhouse career has been tethered to polyethylene. Poly to cover the roof, sidewalls and endwalls. Sheets of poly for partitions and covers for almost anything. You name it and poly has been economical for as long as I have been around greenhouses. It’s versatile, easy to work with, forgiving and functional in countless settings.
My comfort level working with poly instinctively motivated me to hang a 4 mil sheet inside the sidewall to create an insulative dead air space heading into the second heating season. It was attached to an aftermarket rail mounted inside the greenhouse at the top of the sidewall as a psuedo-electrical raceway. For reference, this raceway rail was mounted an inch above the sidewall’s externally mounted knee rail but, again, on the inside.
The poly draped loosely to the ground and, following the heating season, was bunched up and tied at the top to allow sidewall ventilation to occur. Visit sgaft.com for additional pictures, details and discussion of the entire sidewall evolution.
One additional note: the ends of roll up sidewall vents are sealed with common wiggle wire to prevent air leakage and infiltration through the heating season. Sealing the vents this way requires that they be deactivated for the winter. Without side ventilation, winter cooling in a northern greenhouse is accomplished solely by the ridge vent. With this in mind, hanging a poly sheet inside the sidewall didn’t restrict ventilation performance during the heating season.
SIDEWALL-CEILING INTEGRATION
The single layer of poly worked well during the second heating season by creating a dead air space between the exterior roll up sidewall fabric and the heated interior similar to that created between the inflated double poly on the roof. The master plan for this new greenhouse included an energy/ shade curtain system as soon as one could be budgeted. That customized package of design features referenced earlier? Saving money on the side vents factored into pulling the trigger on the energy curtain prior to the third heating season.
Once the curtain install started, it was much easier to understand installation diagrams by visualizing how the puzzle pieces needed to fit together. It became clear that my seasonal approach to managing the sidewalls needed to be integrated with the curtain system to maximize energy efficiency. The poly sheet had worked for winter insulation, as did bunching it up at the top rail for spring through fall ventilation. How the curtain would be integrated into the sidewall insulation, however, presented challenges.
First, the curtain system includes an apron, separate from the actual curtain, to be installed along the knee wall to provide a transition seal between the ceiling curtain fabric and the sides of the house. This was a woven, white synthetic fabric whose top edge provided support for the edge of the curtain to slide over and sit atop while closed.
Unfortunately, due to my customized side/knee wall, this apron was a little too narrow to offer enough of a base upon which the curtain fabric rode and sat during the night. The edge of the curtain routinely slipped or fell off the apron due to insufficient overlap, allowing cold ceiling air to drop into the heated space below. As stated above and on cue: poly to the rescue. A wider apron was cut from a 6 mil sheet of poly and mounted 6 inches higher, which created the base needed for the curtain to slide across and remain atop while closed.
Another challenge was that the loose sheet of poly insulation draped along the sidewall wasn’t sealed along the ground, allowing cold air from the isolated area above the curtain and outside the sidewall drape to tumble down and infiltrate the heated greenhouse space along the ground. Again, as my first experience with an energy curtain unfolded, it became clear how all the pieces needed to fit together to achieve maximum energy use efficiency.
TWIN WALL’S EVEN BETTER
So, being a poly guy for most of my career finally took a back seat to a better alternative for insulating the sidewalls. This time it was twin wall polycarbonate. I had become comfortable installing it on this house’s end walls, and that experience allowed me to visualize using it to upgrade interior insulation of the sidewalls. Figure 2 shows the finished project with the energy curtain closed.
In the picture, from top to bottom, is the energy curtain closed and sitting on top of the poly apron. Next, the poly apron is secured behind the upper rail of the polycarbonate insulation, forming a tight seal. At the bottom, the polycarb is buried in the crushed stone gutter to prevent cold air from entering the heated space along the floor.
Voila! Challenges solved: cold ceiling air completely separated from heated air and roll up sidewalls insulated to the max. An integrated, sealed envelope of cold air completely separated from the heated space inside. And holding my hand an inch away from the sidewall now felt toasty instead of cold.

CONCLUSION
As suggested in the opening statement, sidewall management is not a passive task once a greenhouse is operational. The integration of this house’s sidewalls with the rest of the house to maximize energy use efficiency was a process of growing into the structure, trying different things and leveraging experience.
Shoulder season ventilation in March-April and September-October is accomplished by removing (spring) and installing (fall) one or more polycarbonate panels. Details of the installation process and costs continue at sgaft.com.

 Video Library
Latest News
see all news »